
 Xrf Gold Analyzer
 Handheld Alloy Analyzer
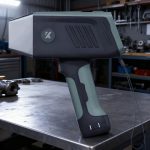 Handheld Mining Analyzer
 Other XRF Analyzer
XRF Analyzer Quick-Start: 10-Minute Pawnshop Setup Guide

The first day with a new XRF analyzer determines how well it performs for the next several years. Decisions made during installation — where it sits, how it is powered, who is allowed to operate it, what gets recorded — are difficult to unwind once the shop has built habits around them.
This is a Day-1 deployment checklist: unboxing to first verified reading. It deliberately does not cover ongoing calibration schedules, which are a separate discipline documented in our calibration guide. The scope here is getting the instrument correctly established before the first customer transaction depends on it.
Before the instrument arrives
Three preparations save a great deal of rework and are best completed before the box is opened.
Confirm your regulatory position
XRF analyzers produce ionizing radiation and are regulated. Requirements differ substantially by jurisdiction — some require registration, some a licence, some operator certification, some periodic inspection, some a designated radiation safety officer.
Establish what applies to you before the instrument is in the building, because operating outside the framework is a compliance problem regardless of how safe the device actually is. Our radiation safety and compliance guide covers the common regimes.
Choose the location on technical grounds
The temptation is to place the instrument wherever there is counter space. Four criteria should govern instead:
- Thermal stability. Away from direct sunlight, exterior doors, radiators, and HVAC outlets. Detector performance is temperature dependent, and a machine sitting in a thermal gradient drifts.
- A solid, level surface. Vibration degrades readings, and a wobbling counter makes consistent sample positioning impossible.
- Customer sightline. Testing in the customer’s view prevents most disputes about manipulation. This is an operational advantage, not merely a courtesy.
- Clean air. Away from areas where metal filings, polishing dust, or aerosols circulate. Contamination on the window and in the chamber is a leading cause of premature detector problems.
Sort out the power supply
These instruments are sensitive to power quality. Voltage sags, spikes, and interruptions cause drift, aborted measurements, and in the worst case damage to the tube or detector electronics.
Provide a dedicated circuit where possible, and an uninterruptible power supply with voltage regulation. Plugging a precision instrument into a shared circuit with refrigeration, air conditioning, or power tools is a known source of intermittent faults that are extremely difficult to diagnose afterwards.
Unboxing and physical setup
Inspect before powering on
Check the shipping carton for crush and impact damage, and photograph anything suspect before unpacking. Shipping damage claims depend on evidence gathered at this moment.
Inside, verify the packing list against contents — instrument, power supply, reference standards, sample stage inserts, documentation, calibration certificate. Missing reference standards are a common shipping omission and will stop you completing setup.
Handle the window with care
The detector window is thin and fragile, and it is the single most vulnerable component in the instrument. Do not touch it, do not clean it on Day 1 unless it is visibly contaminated, and do not allow anything to rest against it.
Most premature detector failures in retail environments trace to window damage from a dropped or dragged sample, not to electronic wear.
Allow the instrument to acclimatize
An instrument shipped in cold weather arrives well below room temperature, and condensation can form on internal surfaces when it warms. Leave it unpowered in the operating environment for several hours before switching on — overnight if it arrived cold.
This step is frequently skipped and occasionally causes damage that is entirely avoidable.
Verify the calibration certificate
The instrument should arrive with a factory calibration certificate stating what it was calibrated against, when, and by whom. Check that the calibration covers the alloy families you will actually handle.
An instrument calibrated for one application and deployed for another will produce confident results outside its validated range without any warning that it is extrapolating.
First power-on
Allow full warm-up
Power on and wait a minimum of thirty minutes before the first measurement, and preferably longer on the first day. The detector cooler needs to reach thermal equilibrium and the tube needs to stabilize.
Readings taken during warm-up drift, and an operator who tests immediately forms a false impression of the instrument’s accuracy that can persist for months.
Set date, time and units
Trivial but consequential. Records carrying wrong timestamps are substantially weaker in a dispute, and unit mismatches between the analyzer and the shop’s scales create reconciliation errors that are tedious to trace.
Run the internal diagnostics
Most instruments include a self-test covering detector response, tube output, and electronics. Run it and record the result. This becomes the baseline against which future performance is compared.
Measure the reference standards
This is the acceptance test. Measure each supplied certified reference material and compare against its certificate value.
Results should fall within the tolerance stated on the certificate. If they do not, stop and contact the supplier — do not proceed to customer transactions and do not attempt to correct the discrepancy with a user calibration adjustment on Day 1.
Record these initial values. They are your reference point for detecting drift later, and reconstructing them retrospectively is impossible.
Integrating the analyzer into the buying workflow
An instrument that sits beside the existing process rather than inside it gets used inconsistently. Deciding where measurement fits in the transaction sequence is a Day-1 decision, not something to settle later by habit.
Where measurement belongs in the sequence
The workable order is: receive the item, inspect and weigh, measure, then quote. Measuring before weighing loses the density cross-check that catches hollow and filled construction. Quoting before measuring commits you to a number you may have to retract, which is the worst position to negotiate from.
Weighing first also has a subtle benefit — it prevents the reading from anchoring your expectation of what the weight should be.
Deciding what gets tested
Testing everything is impractical in a shop handling volume. Setting an explicit threshold on Day 1 avoids the alternative, which is each staff member deciding case by case under time pressure.
A reasonable structure tests every item above a stated value individually, tests a sample from low-value mixed lots, and tests anything where the customer’s description and the item’s appearance disagree. Writing the threshold down is what makes it survive a busy Saturday.
Handling the queue
A thirty-second measurement becomes a bottleneck when three customers are waiting. Two arrangements help: taking the weight and beginning inspection on the next item while the current measurement runs, and having a defined shorter protocol for low-value items that does not require the full three-spot sequence.
What should not happen is abbreviating the protocol on high-value items because the shop is busy. That is precisely when errors are most expensive.
Costs to budget beyond the instrument
Several ongoing costs are routinely omitted from the purchase decision and then arrive as surprises.
Reference materials
Certified reference standards are consumable in the sense that they need periodic replacement as they wear, become contaminated, or their certification lapses. Budget for a set covering the alloy families you handle, and for replacement on a multi-year cycle.
Service and recalibration
Manufacturer service intervals vary, but an annual or biennial factory calibration is common for instruments used in valuation. This is both a performance measure and, in some jurisdictions, a compliance requirement.
Consumables and spares
Detector windows, sample stage inserts, and cleaning supplies. Window replacement in particular is worth understanding the cost of before it becomes urgent.
Regulatory fees
Registration, licensing, inspection, and operator certification carry recurring costs in jurisdictions that require them.
Staff time
Training, daily reference checks, and record-keeping are real operational costs. Modest individually, but they should be planned rather than absorbed invisibly. The full ownership picture across a realistic period is worked through in our seven-year ownership analysis.
Early problems and what they usually mean
Most Day-1 and week-1 difficulties trace to a small number of causes, and recognizing them saves an unnecessary support call.
Readings drift through the morning
Almost always incomplete warm-up, or the instrument positioned where ambient temperature changes through the day. Check placement against a heat source or an air outlet before suspecting the detector.
Results disagree with a known item
Check mode selection first, then sample positioning, then whether the item is genuinely what you believe. Configuration error is far more common than instrument fault on a new deployment.
Measurements abort or restart
Typically power quality. A shared circuit with a compressor or air conditioner cycling on is a classic cause, and the symptom appears intermittently in a way that resists diagnosis until the circuit is examined.
Small items read strangely
The item is not covering the measurement aperture and the beam is partly striking the stage. Confirm coverage before concluding anything about the material.
Results differ between two operators
Spot selection, essentially always. Have both operators measure the same item at the same defined points and the discrepancy usually disappears.
Configuring measurement modes
Most instruments ship with several measurement modes, and mode selection materially affects results. Getting this configured before staff start using it prevents a persistent source of inconsistency.
Identify which modes you actually need
A pawnshop typically needs two or three: a general karat gold mode, a plating detection mode, and possibly a silver or platinum-group mode. Modes for applications you will never encounter should be hidden or disabled if the software permits, because their availability invites accidental use.
Set a sensible default
The mode the instrument opens in will be the mode most measurements are taken in, whatever the training says. Make the default the one that suits the majority of your transactions.
Document when to switch
Write down, in one line each, the circumstances that require changing mode. “Suspect plating, or reading does not match a karat standard, switch to plating mode.” Staff will not read a manual; they will read a card taped beside the instrument.
Fix the measurement time
Longer counting improves precision. Shorter counting moves the queue. Choose a duration and standardize it, because varying measurement time between operators produces scatter that gets misattributed to the instrument.
Twenty to thirty seconds suits most retail karat determination. High-value items justify longer.
Access control and operator competence
Restrict who can change settings
Separate operator access from administrator access. Staff need to take measurements; they do not need the ability to alter calibration, modify modes, or delete records. Most instruments support this distinction, and enabling it prevents a category of accidental damage that is very difficult to detect after the fact.
Establish what training is required
Beyond any regulatory requirement, define what a person must demonstrate before operating the instrument unsupervised:
- Correct sample positioning and aperture coverage
- The multi-spot protocol and why single readings are insufficient
- Recognizing base metal signatures and non-standard percentages
- Running and interpreting the reference standard check
- Radiation safety basics and the shop’s specific procedures
- What to record and where
Post the safety information
Radiation warning signage as required by your jurisdiction, plus a brief internal notice covering safe operation. Even where the enclosed design makes exposure risk minimal in normal use, the interlock behaviour and the rule against defeating it need to be explicit.
Setting up records from Day 1
Record-keeping established at deployment costs almost nothing. Retrofitted onto an operating shop it is a project.
Instrument log
A running record of reference standard checks, diagnostics, service events, and any anomaly observed. Started on Day 1 with the acceptance test results, this becomes the evidence that the instrument was in control at any given past date.
Transaction records
Decide the fields now: individual spot readings with locations, elements detected, weight, marks, operator, timestamp. Recording individual readings rather than an average is the single most important choice here, because in a dispute the pattern is the evidence and the average conceals it.
Spectrum archiving
If the instrument can store raw spectra, enable it and confirm there is sufficient storage. A spectrum permits reanalysis under a corrected model months later; a stored number cannot be repaired.
Backup
Instrument internal storage fails. Establish an export routine to a shop system or external storage before you accumulate records worth losing.
The first week
Deployment does not end when the first reading is taken.
Run the reference standard every morning
Thirty seconds, recorded in the log. During the first week this establishes the instrument’s normal variation, which is what makes an abnormal result recognizable later.
Test material you already know
Before relying on the instrument for valuations, measure items whose composition you are confident about from previous testing or from purchase records. Agreement builds justified confidence; disagreement surfaces a configuration problem while it is still cheap.
Have staff test the same items independently
Give two operators the same three pieces and compare results. Divergence at this stage is almost always spot selection rather than instrument behaviour, and catching it in week one prevents months of inconsistent valuations.
Review the first disputed transaction carefully
The first time a customer challenges a reading, examine what was recorded rather than defending the outcome. This is the most informative feedback the protocol will receive.
Frequently asked questions
How long should I wait before the first measurement?
A minimum of thirty minutes from power-on for thermal equilibrium, and longer on the first day. If the instrument arrived in cold weather, leave it unpowered in the operating environment for several hours first to avoid condensation.
Do I need a licence to operate an XRF analyzer?
It depends entirely on jurisdiction. Requirements range from no registration to full licensing with certified operators and periodic inspection. Establish your local position before the instrument arrives rather than after.
Where should the analyzer be placed?
On a solid, level surface away from direct sunlight, HVAC outlets, exterior doors, and dust sources, and positioned so customers can watch measurements being taken. Thermal stability and clean air matter more than convenience.
Does it need a dedicated power circuit?
Strongly preferable. Voltage fluctuation from shared circuits with refrigeration or air conditioning causes drift and intermittent faults that are very difficult to diagnose. A UPS with voltage regulation is a worthwhile addition.
What should I do if the reference standards read incorrectly on Day 1?
Stop and contact the supplier. Do not begin customer transactions and do not attempt to correct the discrepancy with a user calibration adjustment. An out-of-tolerance acceptance test is a supplier issue, not a configuration task.
Can staff use it immediately after installation?
Only after training on positioning, the multi-spot protocol, reading interpretation, the reference check, and safety procedures. An untrained operator with a correctly functioning instrument produces wrong valuations confidently.
How often should the reference standard be checked?
Daily at the start of the session is a reasonable baseline for a retail counter. It takes under a minute and provides the documentary basis for asserting the instrument was in control on any given day.
What is the most common Day-1 mistake?
Taking measurements before warm-up is complete and concluding from those drifting readings that the instrument is inaccurate. The second most common is not recording the initial reference standard values, which removes the baseline needed to detect drift later.
The checklist condensed
Confirm regulatory requirements. Choose a thermally stable, clean, visible location on a dedicated circuit. Inspect and acclimatize before powering on. Warm up thirty minutes minimum. Run diagnostics and measure every reference standard, recording the values. Configure modes and fix the measurement duration. Separate operator and administrator access. Establish the instrument log and transaction record format. Train before use.
The underlying point is that an XRF analyzer is a measuring instrument, not an appliance. The number on the screen is only as good as the environment, the configuration, and the operator behind it — and all three are established on the first day.
For the ongoing verification routine that follows deployment, see the calibration guide. For the counter workflow staff will use daily, see the gold-coated jewelry verification tutorial.
Deciding on placement: three layouts that work
Counter geometry varies, and the right arrangement depends on how the shop actually operates.
Counter-top, customer-facing
The instrument sits on the buying counter, angled so the customer can see the sample chamber and the screen. This is the strongest arrangement for dispute prevention, because the customer watches the entire process.
The trade-off is exposure — the instrument is in a busy area, at risk from spills, knocks, and dust. It also occupies counter space that may be scarce.
Counter-end, side-on
Positioned at the end of the counter, perpendicular to the customer. The customer can still see the process but the instrument is out of the main working area.
This is usually the best compromise for a busy shop, keeping visibility while reducing physical risk.
Back-counter with a screen repeat
The instrument sits behind the counter with results displayed on a customer-facing monitor. Protects the instrument well and keeps transparency.
The weakness is that the customer sees a number rather than a process, which is less persuasive when a result is disputed. It also tempts staff to test out of view, which erodes the transparency benefit entirely.
What to avoid
A separate room. The moment verification requires leaving the counter, it gets skipped under pressure — and the transactions where it gets skipped are disproportionately the busy, high-value ones where it matters most.
Security considerations at deployment
An XRF analyzer is a valuable, portable, and readily resold item positioned in a shop that handles precious metals. Its own security deserves brief thought on Day 1.
- Physical restraint. A security cable or bolt-down mount for benchtop units, particularly where the instrument is visible from the street.
- Out-of-hours position. If the shop secures inventory overnight, the analyzer belongs in that arrangement.
- Serial number recorded in your asset register and insurance schedule, with a photograph.
- Insurance notification. Confirm the instrument is covered and at what value, since equipment of this class may exceed a general contents limit.
- Data. Transaction records on the instrument may contain information subject to privacy obligations. Access control matters for that reason as well as for configuration protection.
A Day-1 sign-off sheet
Completing deployment properly is easier against a list that gets signed rather than a general intention. The following covers the essentials in order.
- Regulatory position confirmed and any registration or licence in place
- Location selected against thermal, vibration, visibility, and cleanliness criteria
- Dedicated circuit and UPS installed
- Shipping condition inspected and photographed
- Packing list verified, including reference standards
- Instrument acclimatized to room temperature before power-on
- Calibration certificate checked against intended application
- Thirty-minute minimum warm-up completed
- Date, time, and units configured
- Internal diagnostics run and result recorded
- Every reference standard measured and values recorded as baseline
- Measurement modes configured, defaults set, unused modes disabled
- Standard measurement duration fixed
- Operator and administrator access separated
- Instrument log started
- Transaction record format defined and in use
- Spectrum archiving enabled and storage confirmed
- Backup or export routine established
- Safety signage posted
- Staff trained and competence confirmed before unsupervised use
Twenty items, most taking minutes. Completed together on the first day, they establish an instrument that produces defensible numbers. Left to accumulate over the first months, several of them never get done at all — and the ones most often missed, baseline reference values and record format, are precisely the ones that cannot be reconstructed later.
The first day with a new XRF analyzer determines how well it performs for the next several years. Decisions made during installation — where it sits, how it is powered, who is allowed to operate it, what gets recorded — are difficult to unwind once the shop has built habits around them. This is a […]